Cisco FirePOWER Management Center v6 – Initial Installation
This will review deploying the Cisco FirePOWER Management Center on ESXi. The Management Center makes it possible to manage multiple FirePOWER devices from a central server, allowing you to scale up more efficiently.
Before we get started, a few prerequisites. Make sure you have a VMware host (ESXi or ESX). You will need capacity on this host for 8GB RAM, 4 vCPU’s and 250GB storage (thick provisioned) for the FirePOWER Management Center VM. You can deploy this thin provisioned if you must but performance will suffer.
You will also need to make sure your ASA’s have FirePOWER deployed on them and running at least version 6.1.
Download the the Management Center appliance from Cisco’s web site. Cisco tends to move things around but as of now you can find it by following this path: Downloads > Security > FirePOWER Management Center
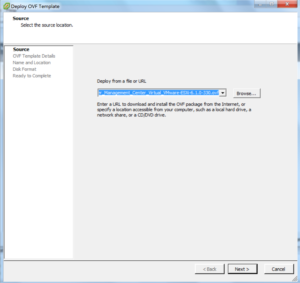
Once you have the files you will want to import the OVF into your VMware environment.
From the vSphere client select File, Deploy OVF Template, browse to the downloaded file and click Next
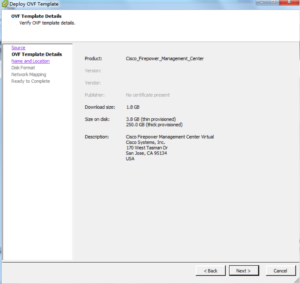
The next screen displays the OVF Template details, you can’t change anything here so click Next
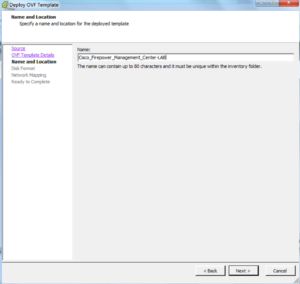
Give it a name and click Next
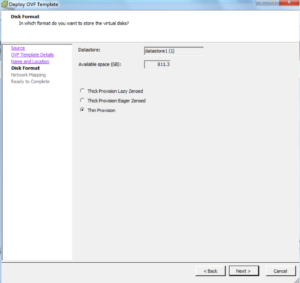
Select your disk format. You see in the screenshot I chose thin to save some disk space in my lab. For production you want to choose thick and click Next.
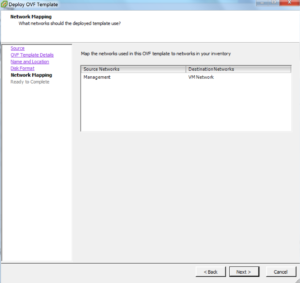
Setup the networking so you have access to this VM. I’m putting it on my server network. Select Next.
Click Finish to get the installation started.
It’ll take a few minutes to transfer the image up and get the VM ready for configuration. When it’s done, power on the virtual machine and open up a console so you can watch it boot, give it at least 20 minutes to run through it’s startup. The warning shown in the console screen below says it can take up to 30 minutes, this is not an exaggeration on some systems so be patient.

Once it FINALLY finishes you have to login and do the configuration. The default credentials are admin/Admin123
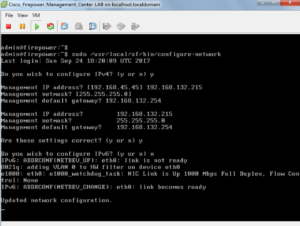
After you are logged in execute the following command:
sudo /usr/local/sf/bin/configure-network
When prompted for IPv4 type Y and press enter
Enter the requested information, remember to give it a valid IP address for the VM network you are on. Typically this is your server or management network. You’ll also have to give it a valid default gateway for that network.
When prompted for IPv6 I entered N, if you are manually configuring it for your deployment enter Y and configure it.
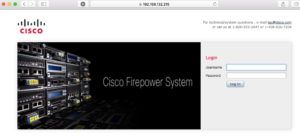
Wait another few minutes and login with a web browser https://x.x.x.x/ using the same credentials mentioned above.
Once you login it launches the basic configuration form, DO NOT SKIP THIS!
Set a new password. Change the hostname to something appropriate for your environment. Add a domain name and internal DNS server (so it can resolve internal AND Internet hosts like your computers). I left NTP enabled and set to the source fire pool, change this as appropriate for your environment but PLEASE use a NTP source rather then manual!
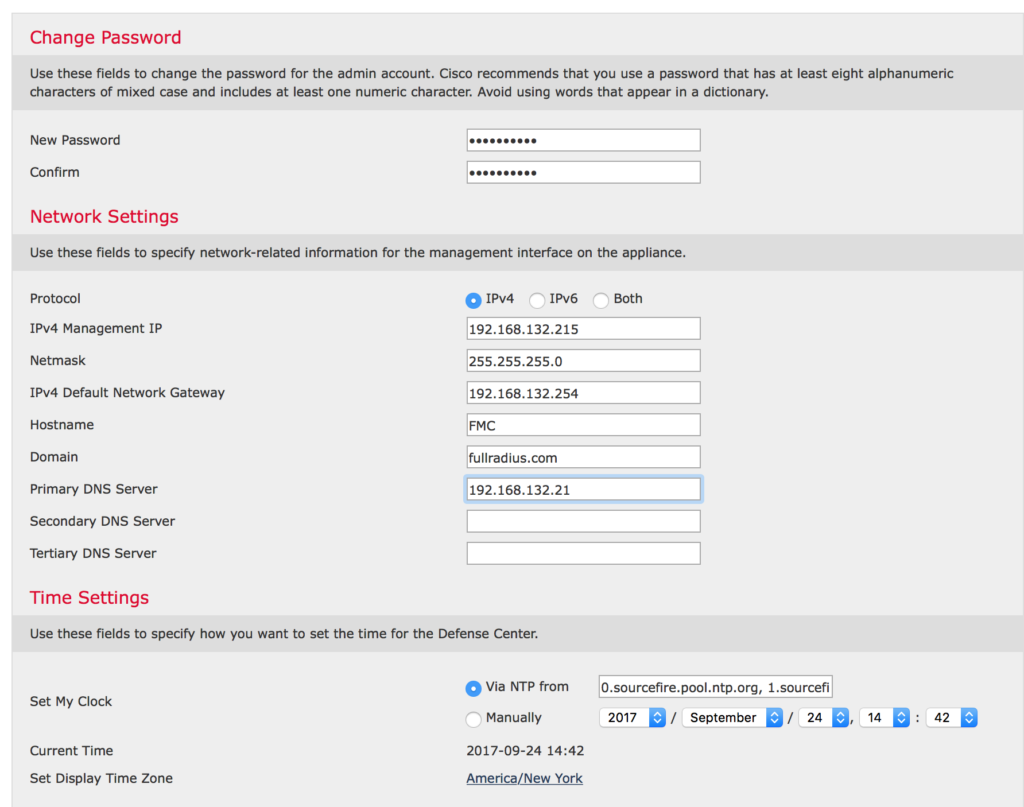
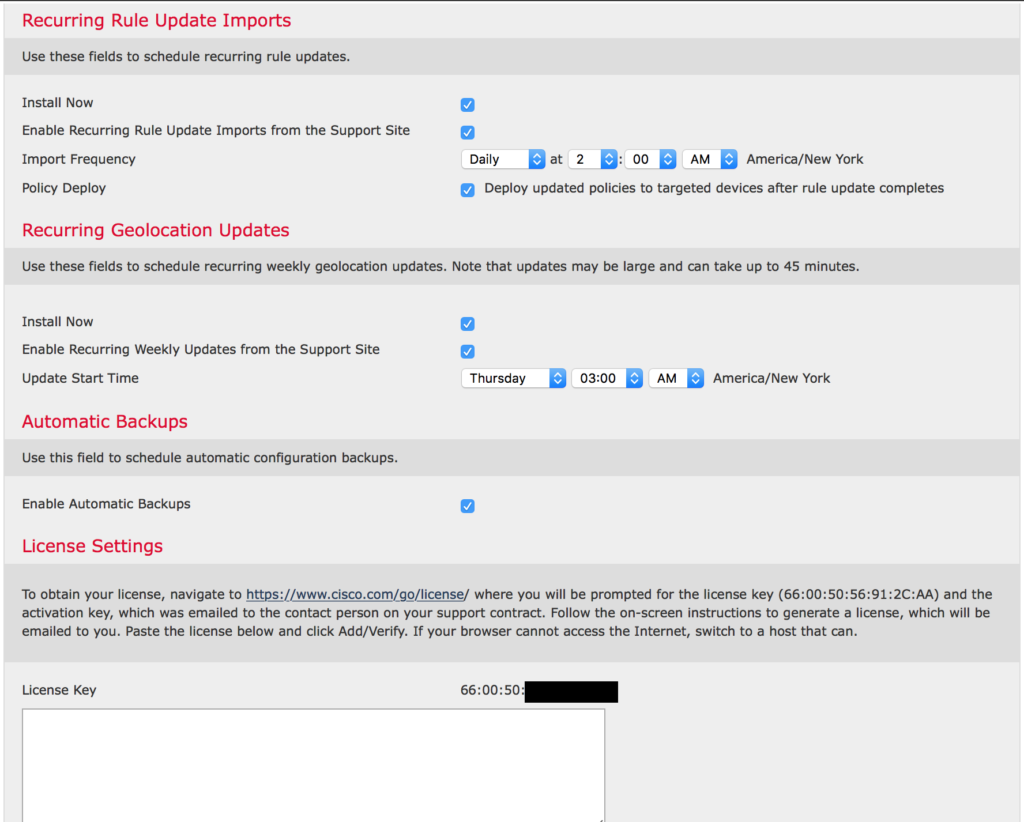
Scroll down and set the remaining settings. I enabled recurring rule and product updates, giving them appropriate times of the day for my environment. I also enabled automatic backups.
Note I left the license field blank, don’t license it yet. I license it after I import my devices, that way if there’s an issue I can just redeploy the appliance and not have to worry about getting a new license file.
Accept the EULA and click Apply. This will result in more waiting, be patient while it configures the changes. You know it’s done when it brings you to the main dashboard page.
Network Discovery Policy
Older versions of this product (when Cisco first purchased the company and was still integrating the product) used to only look for RFC 1918 addresses. With version 6 they changed this to look for 0.0.0.0/0 to prevent mis-configurations. This is great and all but it’s literally everything and some firewalls will choke trying to identify all the things.
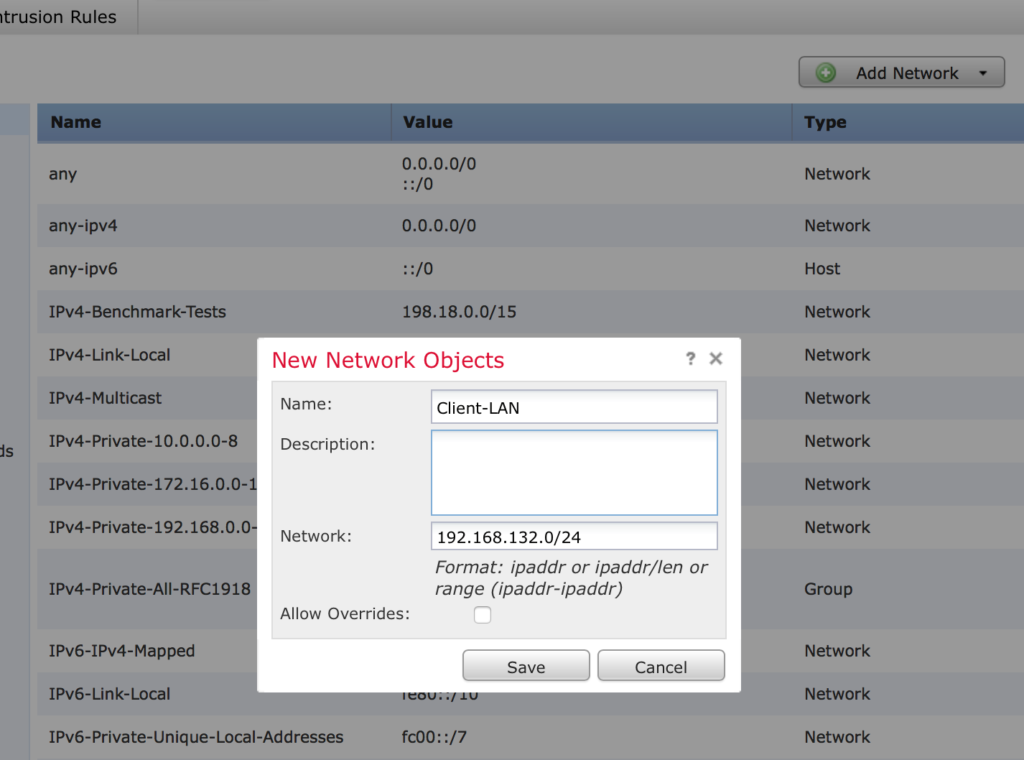
To streamline this we’ll add objects for our networks to limit what the product will attempt to identify.
Go to Objects > Object Management and click Add Network > Add Object and add objects for your local network.
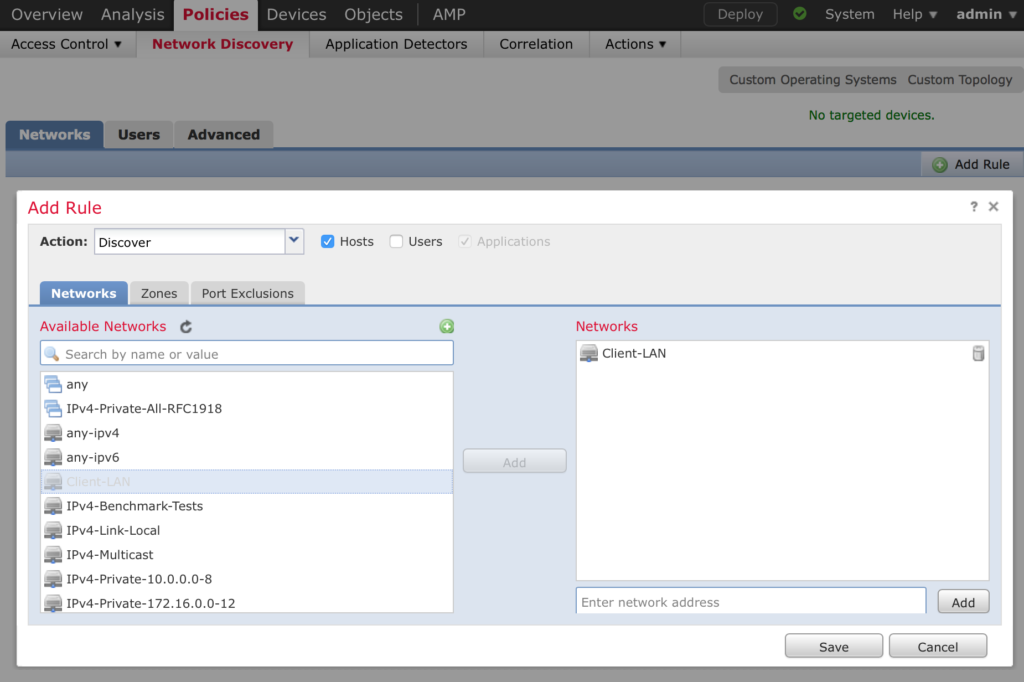
Now we need to edit the default Network Discovery Policy
Navigate to Policies > Network Discovery
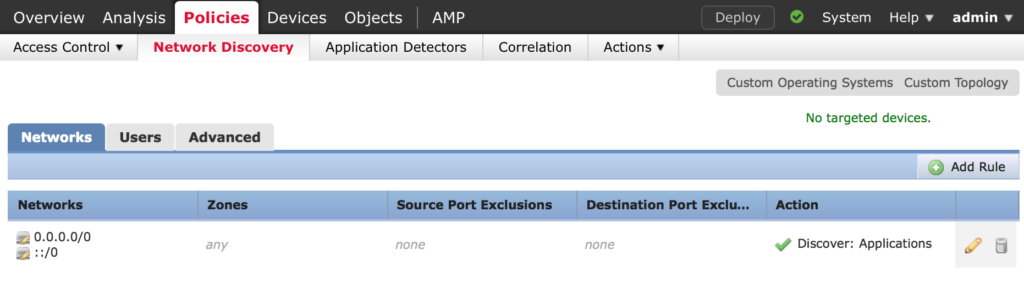
Click on the trash can icon to remove the default policy and create your own by clicking on Add Rule
Adding a License to your Management Center
You used to have to add a license file to use the FirePOWER Management Center. As of v6.0 you don’t need one any more. If you try to add a license (the option is still available) you are presented with this message:
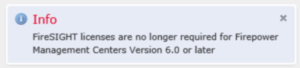
NOTE: FireSIGHT is the old name for FirePOWER, it was called SourceFire before that.
You will need to add feature licenses depending on what features you want to use, that’s for another article but here’s a quick summary of licenses:
- Control License – This comes for free with your SFR (ASA or SFR Appliance). It comes in the box, if you are missing it call Cisco to get one re-issued. This is required for every sensor device.
- Protection License – Intrusion Detection/Prevention Services. This ones comes in the box as well and is installed with the Control license.
- Malware License – Cisco AMP services (Advanced Malware Protection). Yearly license renewal for network based malware detection and blocking.
- URL Filtering – Category and reputation based URL filtering.
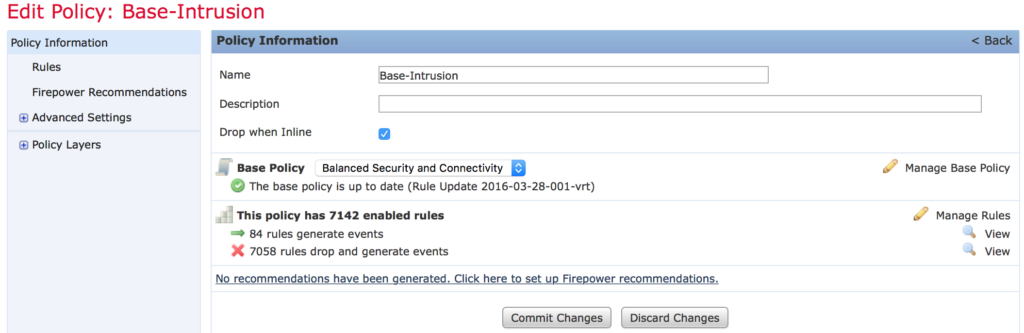
Adding FirePOWER Intrusion Policy
Navigate to Policies > Intrusion and click Create Policy
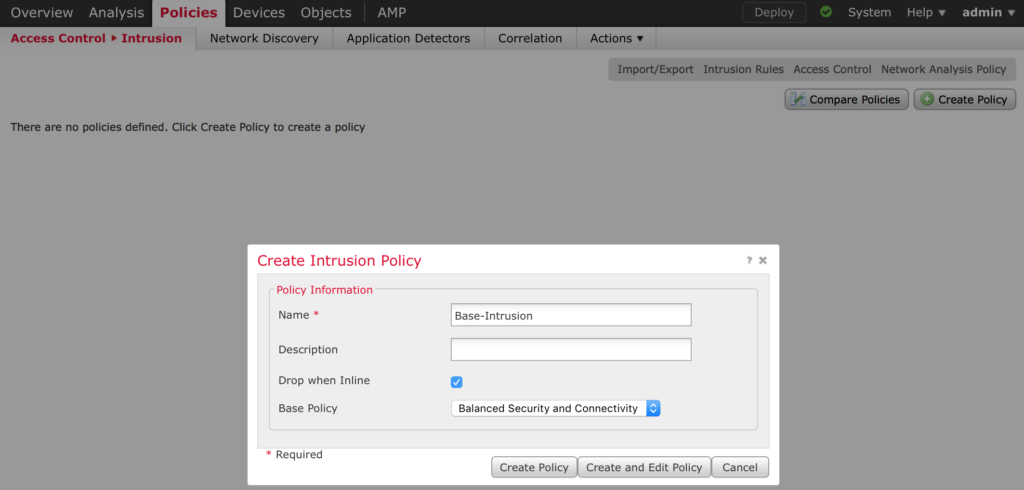
Give the policy a name and select the base settings. I’ve found selecting Balanced Security and Connectivity to be the least intrusive while still providing protection. Click Create and Edit Policy when done so we can customize it a bit.
Click Rules and scroll down to the Malware section. These don’t require an AMP license so it’s a great idea to leverage them! Click Select All. Under Rule State click Drop and Generate Alerts.
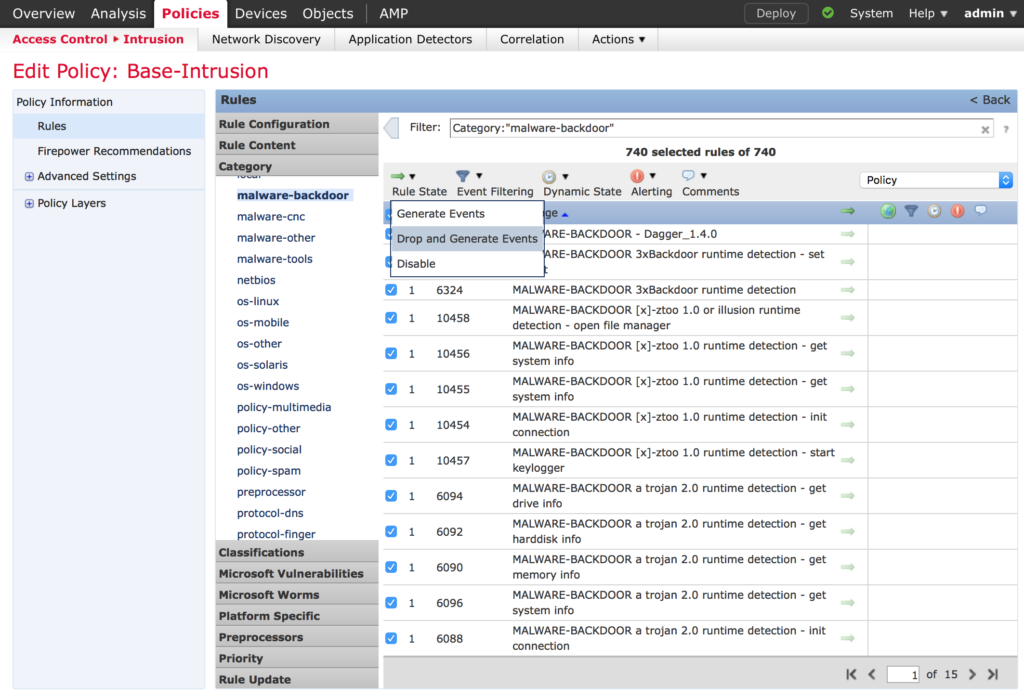
Repeat above for each of the four Malware categories.
Repeat above for pua-adware, pua-other (Probably Unwanted Application), Indicator-compromise, exploit-kit and blacklist.
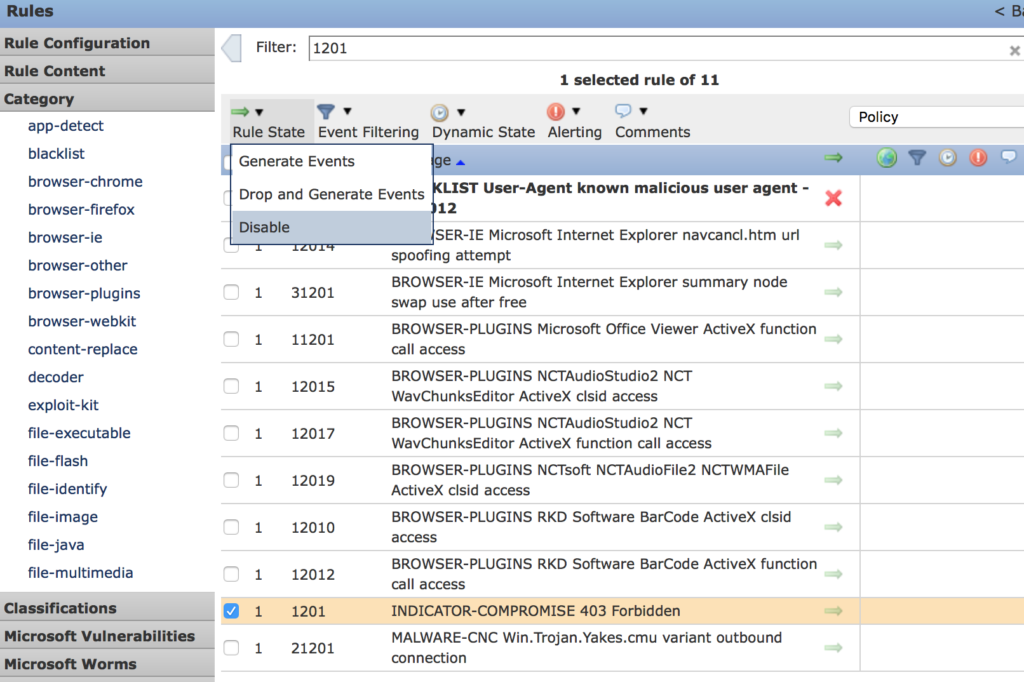
Finally, search for 1201 in the Filter area. Select 1201 INDICATOR-COMPROMISE 403 Forbidding and set Disable. (your logs will thank you for doing this).
Click on Policy Information and click Commit Changes to
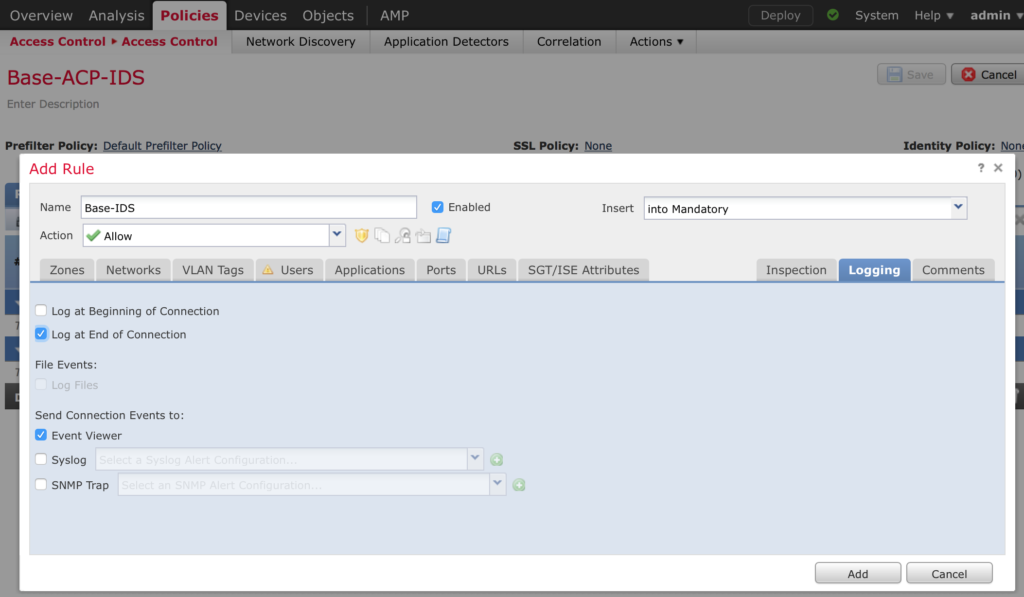
To enable this policy it has to be added to an Access Policy, let’s create one for this.
Navigate to Policies > Access Control
If this is a new installation and you don’t have a policy click Create Policy. Give it a name and select Intrusion for the category.
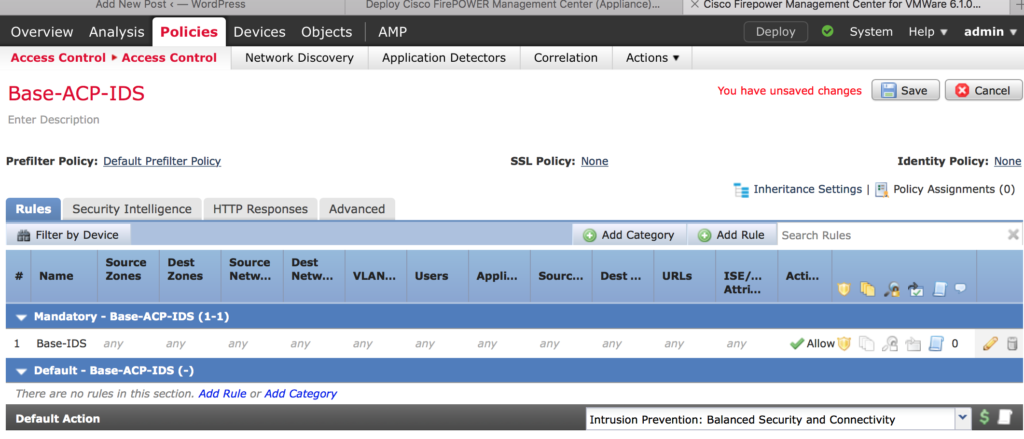
Click Add Rule to add a new IDS rule and give it a name. Click on the Networks tab, add ANY and ANY to source and destination. Click on the Inspection tab and select your Intrusion policy created above.

Click on Logging and enable Log at end of connection. Click Add when done.
Don’t forget to save your work! Click on the Save button to save your policy.
Add Cisco ASA SFR TO FirePOWER Manament Console
You have to add your Cisco ASA SFR modules to be managed by FirePOWER Management Center. If you haven’t already done the base setup for the modules and gotten them to version 6.1 follow this post, Cisco ASA SFR module v6 preparation. Otherwise continue here.
Also of note, I’m not purposely jumping around here but in order to add a device you first need to have an Access Control Policy which is why I’m suggesting this spot in the process for adding the ASA devices.
ssh to your Cisco ASA
From the # prompt enter the session to the SFR module by entering the following command:
session sfr console
Enter the following command to register the device to a FMC
configure manager add ip_address key
Replace ip_address with the IP address of your FMC and replace key with a pre shared key you are creating, make a note of it.
Exit the SFR session by pressing CTRL-SHIFT-6-X
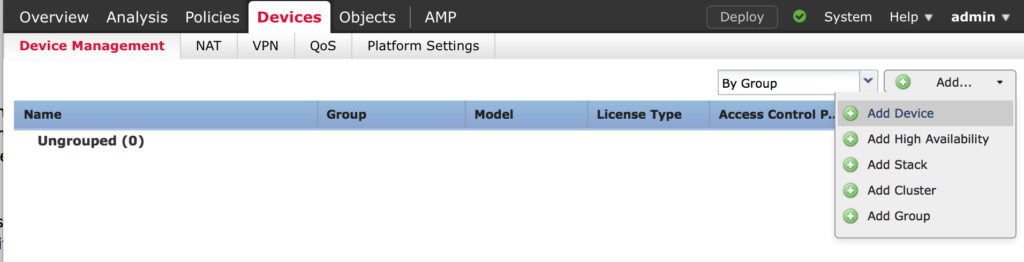
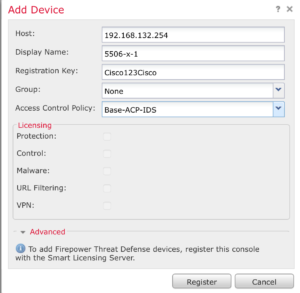
From FirePower Management Center navigate to Devices > Device management and click Add. If you have more then one device click Add Group first and give it a name. You can then follow the next step under the group. If you have a single SFR device just click Add Device.
Enter the IP address of the ASA, give it a friendly name, the registration key you entered on the ASA and select an Access Control Policy. Click Register.
At this point your SFR module is being managed by the FirePOWER Management Center but nothing is being reported and you probably have an error being reported about no data being received from the data plane. This is because we still have to mirror traffic to the SFR module.
- Connect to your ASA via ASDM.
- Navigate to Configuration > Firewall > Service Policy Rules
- Click Add > Add Service Policy Rule
- Click Any Traffic to match anything
- Click the Rules Actions page and click the ASA FirePOWER Inspection tab
- In the If ASA FirePOWER Card Fails click Permit traffic (this keeps production from grinding to a halt if the module crashes or fails)
- (Optional) Check Monitor-only to send a read only copy of the traffic to the module. This is great for demo’s or for initially setting up the system to keep changes from accidentally impacting production. Just don’t forget to come back here and remove the check box when you are ready for production!
- Click Finish and Apply
- Save your changes
Adding FirePOWER AMP Policy
Remember, using AMP services requires a paid subscription license. Check out this post for adding licenses. <ADD LINK>Without a license, you can still enable file blocks, you just can’t enable the Malware Cloud Lookup or Block Malware actions.
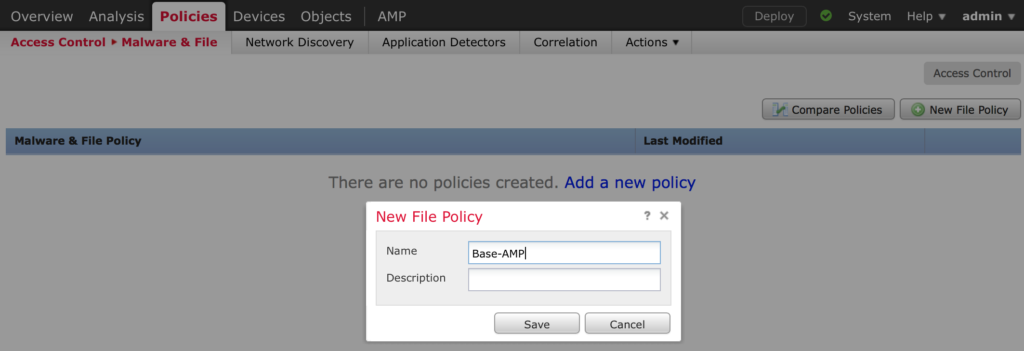
To add an AMP Policy, navigate to Policies > Malware & File and click New File Policy. Give your policy a name and click SAVE.
Now let’s add some rules. Click Add Rule.
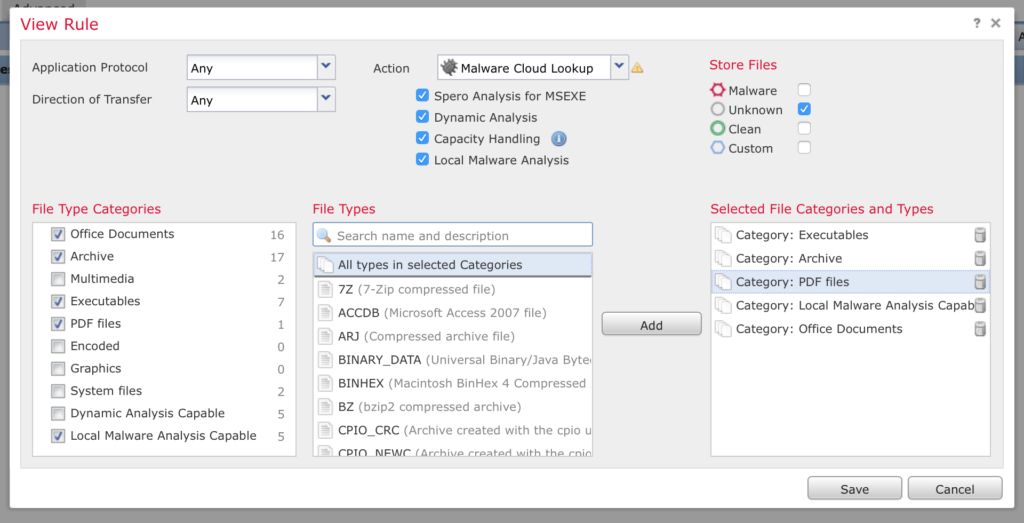
Add to the rule the file types you want to scan. For this example I’m choosing Executable, Archies, PDF, Office Documents and Local Malware Analysis Capable. I’ve also enabled storing of unknown files. Click Save
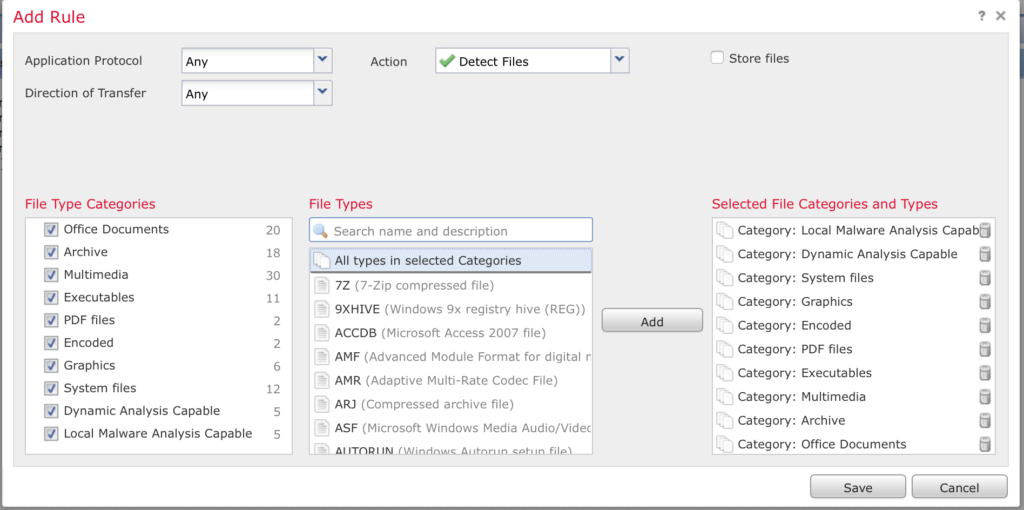
Next, create a new rule BELOW the one you just created to scan all files and click Save.
Click Save to save the new policy.
Now we have to add this rule to your Access Control Policy. Navigate to Policies > Access Control and edit your Access Control policy.
Click Add Rule on your Access Control Policy and give it a name. Click on the Inspection tab and add your new AMP policy.

Click the Logging tab and enable Log at end of connection. Click Add.
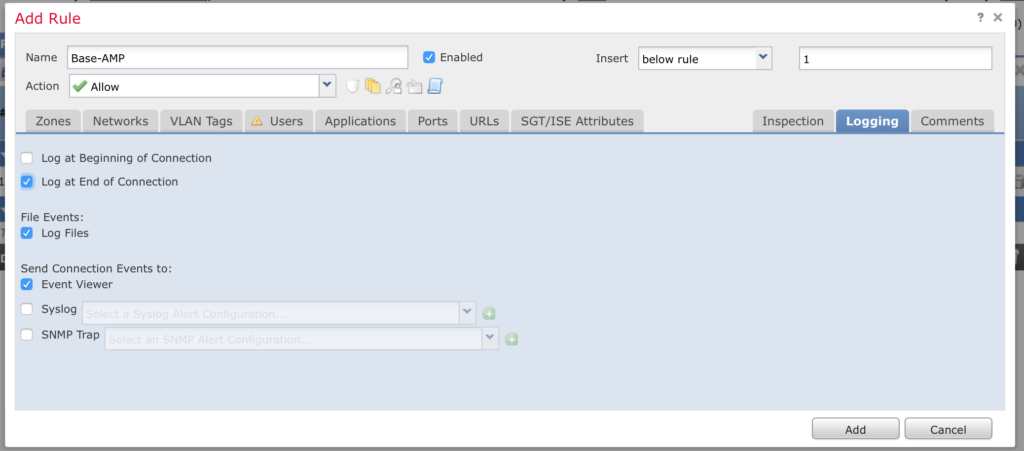
Click Save to save your policy.
Adding FirePOWER URL Policy
Remember, using URL Filtering services requires a paid subscription license. Check out this post for adding licenses.
Adding licenses for FirePOWER features
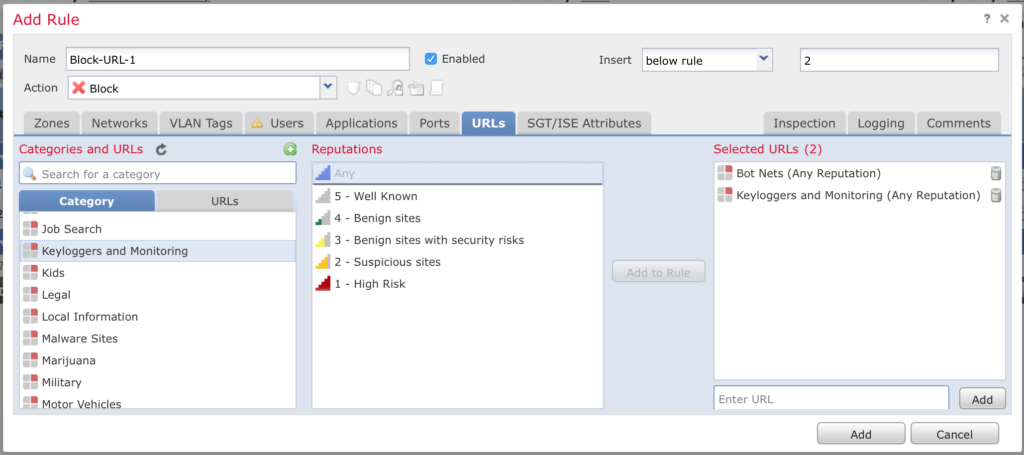
To create this policy it’s a bit different then the others we’ve made, this one is created right on the Access Control Policy. Navigate to Policies > Access Control and edit your policy.
Click Add Rule
Give it a descriptive name, set the Action to block and navigate to the URL tab.
Select and add what you want to block for your organization.
Click on the Logging tab and select Log at Beginning of Connection. Click Add.
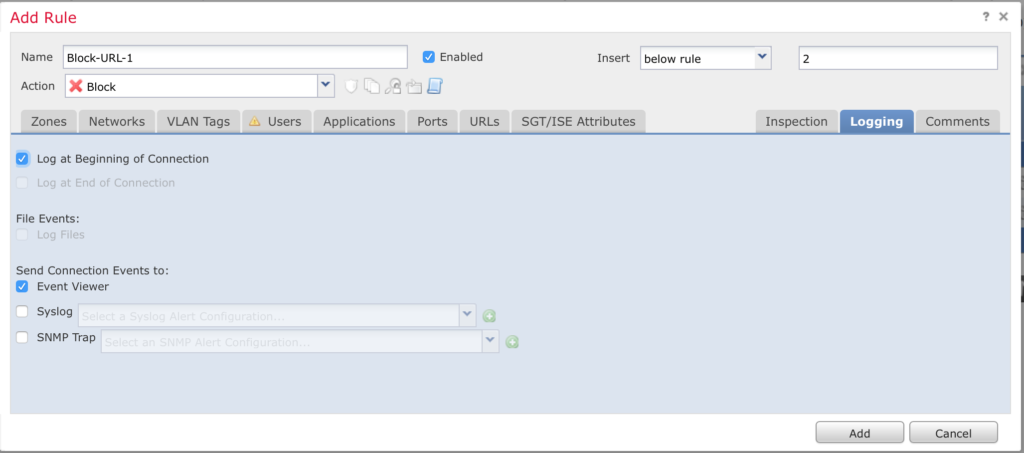
Click Save
You will need to click the Deploy button in the top right corner of the screen to push any policy changes made out to your devices.
