FortiGate VPN – SSL Certificate Installation
Why should you get a certificate for SSL-VPN?
When you setup your FortiGate to let users connect into your network via SSL-VPN you will notice they receive a certificate warning. This is because the certificate being used is the self signed certificate that’s on the firewall. This certificate isn’t “trusted” by clients trying to connect in so they warn you on connection attempts.
You can eliminate this problem and potential support call by purchasing a SSL certificate from a reputable Certificate Authority and installing it on your firewall.
Step 1: Purchase an SSL certificate from a Certificate Authority (CA)
SSL certificates can be purchased from any CA. You only need to purchase a basic SSL certificate for domain validation only but of course, if required you can purchase a more secure SSL certificate.
Step 2: Generate a CSR (Certificate Signing Request)
Some CA’s auto-generate the CSR during the signing process so you might not need to follow step 2, if that’s the case for you move onto step 3, otherwise continue on below.
- Log into your FortiGate and browse to System –> Certificates
- Select Generate in the toolbar
- Enter the required information in the request screen showed below. You want to make sure you set the following:
- Make sure the Certificate Name is unique
- Select Domain Name in the ID type field
- An email address is needed
- Make sure that the keysize is 2048
- Set the Enrollment Method to File based
- If your CA only supports www (like some Comodo certificates) make sure the domain name contains the FQDN you will use for public access, like vpn.fortissldemo.com for example
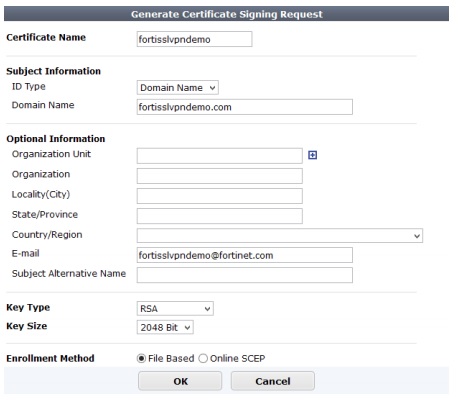
- Select OK. Notice the CSR gets added to the certificate list with a status of PENDING
- Select the CSR and choose Download to save it locally.
Step 3: Follow your providers instructions for uploading the CSR you created and generating the certificate.
Step 4: Import the signed certificate into your FortiGate
- Unzip the file you received from the CA.
There should be 2 .CRT files, a CA certificate with bundle in the name and a local certificate - Log into your FortiGate and browse to System > Certificates
- Select Import > Local Certificate to import the certificate
Note the status will change from Pending to OK
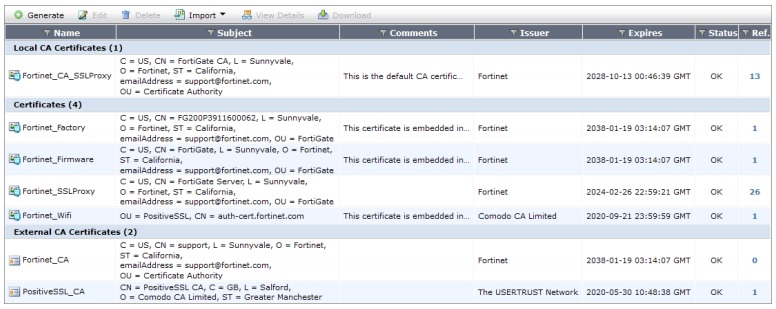
- Import the CA certificate by selecting Import > CA Certificate. It will be listed in the CA certificates section of the certificates list when you are done.
Step 5: Configure your FortiGate device to use the signed certificate
- Log into your FortiGate and browse to VPN > SSL > Settings
- In the Connection Settings section find the Server Certificate field
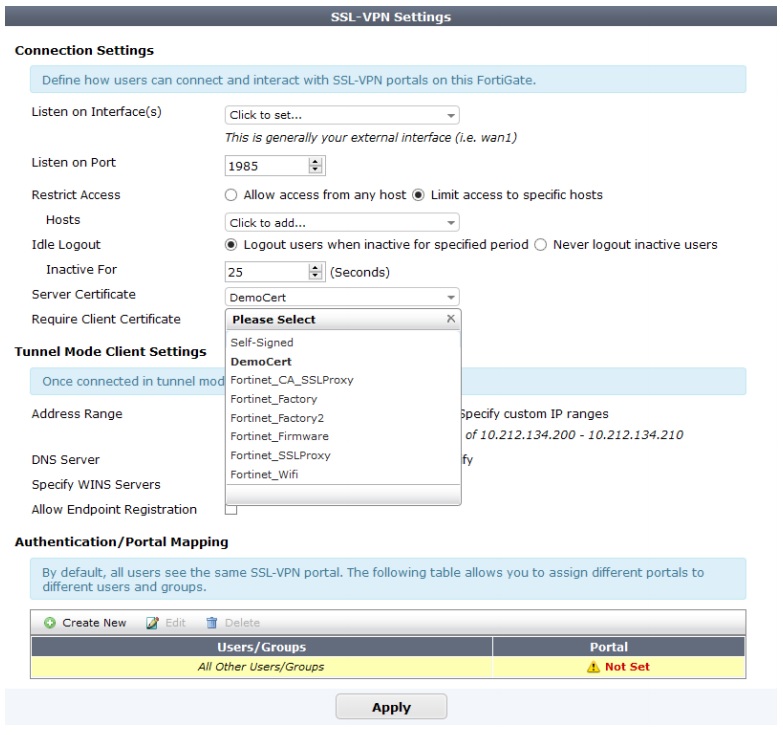
- Select the new certificate and click Apply