FortiGate Inbound Port Forwarding using VIP’s v5.4
This article goes over creating an inbound port forward NAT rule on a FortiGate device. This allows inbound access to a resource behind your firewall using your public IP address.
For this example we’ll create a rule that allows HTTP (port 80) and SMTP (port 25) pointed at one internal server resource.
- The external IP address (WAN interface side) for this example is 1.1.1.1
- The internal IP address (inside interface side) for this example is 2.2.2.2
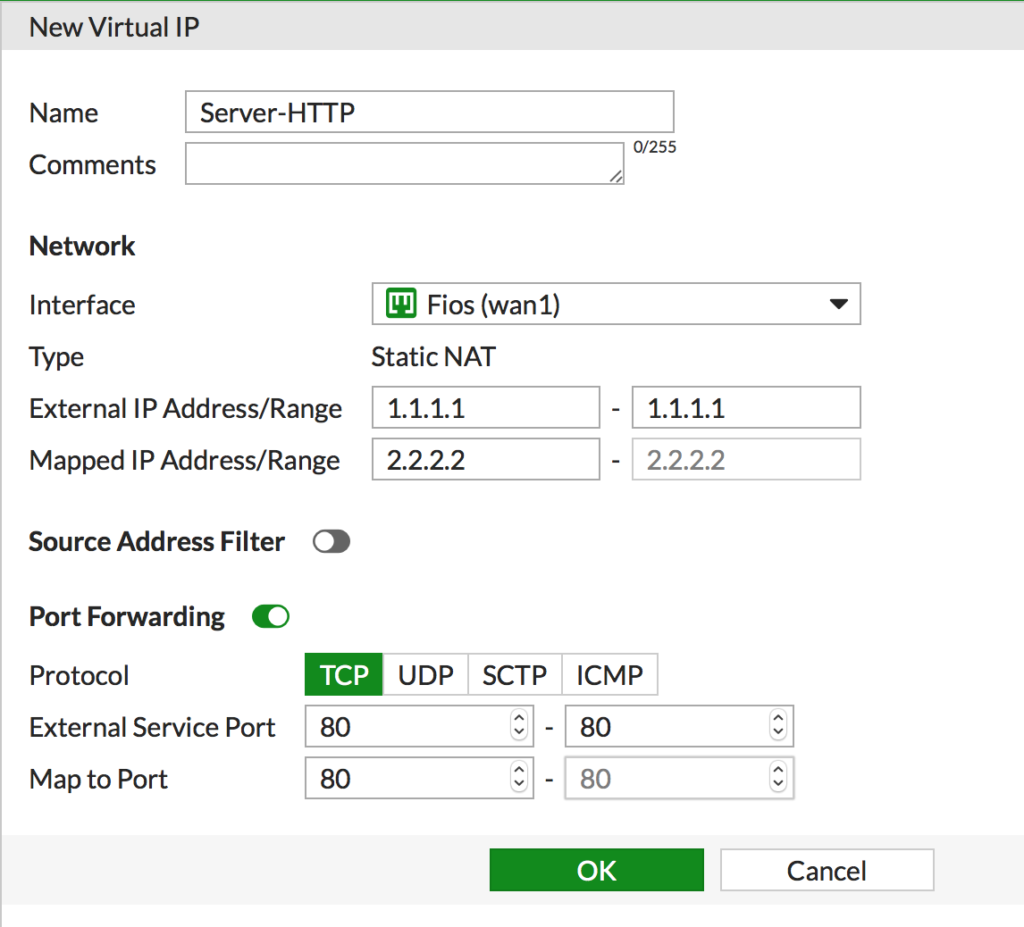
First we’re going to create 2 VIPs, one for each of the ports mentioned above.
- Navigate to Policy & Objects > Virtual IPs. Click Create New > Virtual IP and enter the info for the first port (HTTP) and click OK

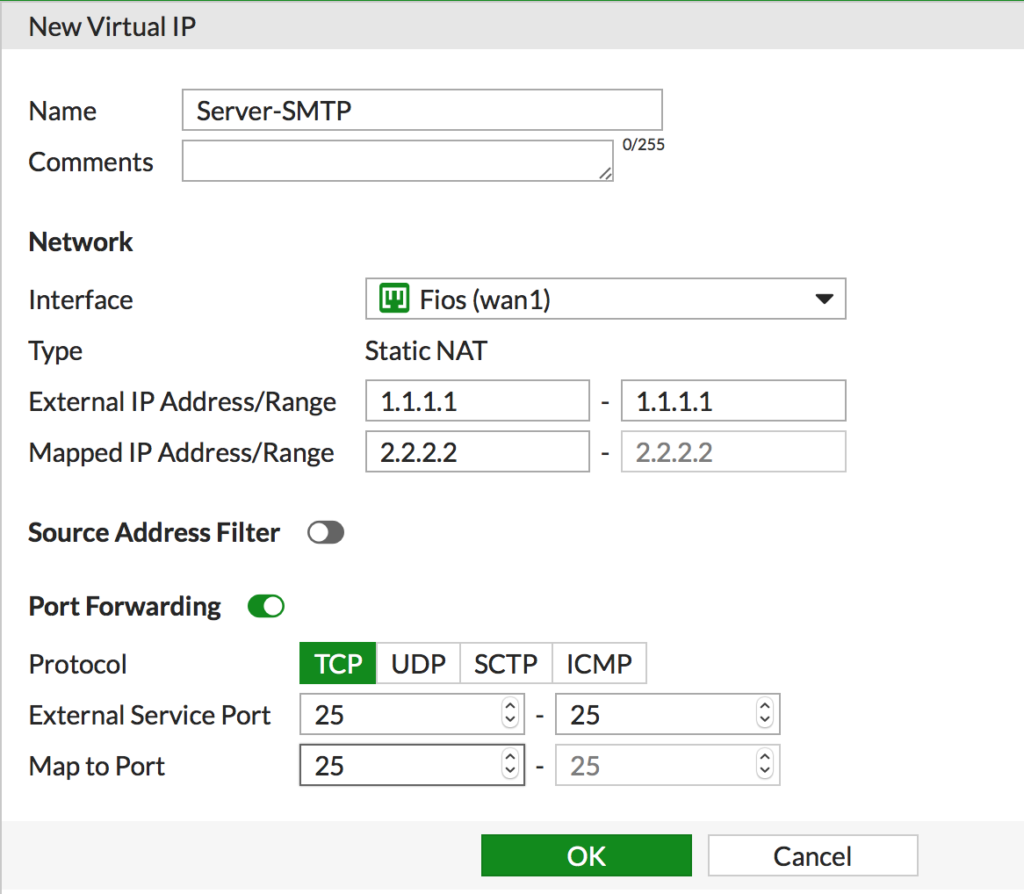
- Repeat this process for the second port you want to forward, SMTP for this example.

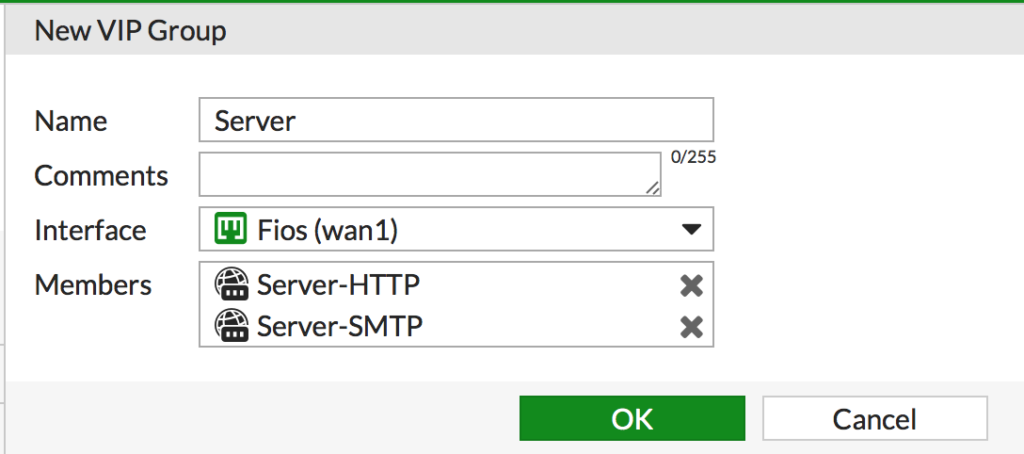
- Next, since there’s more then one port being forwarded we are going to put them in a VIP Group to simplify administration. Navigate to Policy & Objects > Virtual IPs. Click Create New > Virtual IP Group
- Give it a descriptive name, set the interface to the appropriate public interface and add the members and click OK

Now we need a security policy to allow the port forwards in. Remember, NAT (or VIP’s as it’s referred too here) is not security!
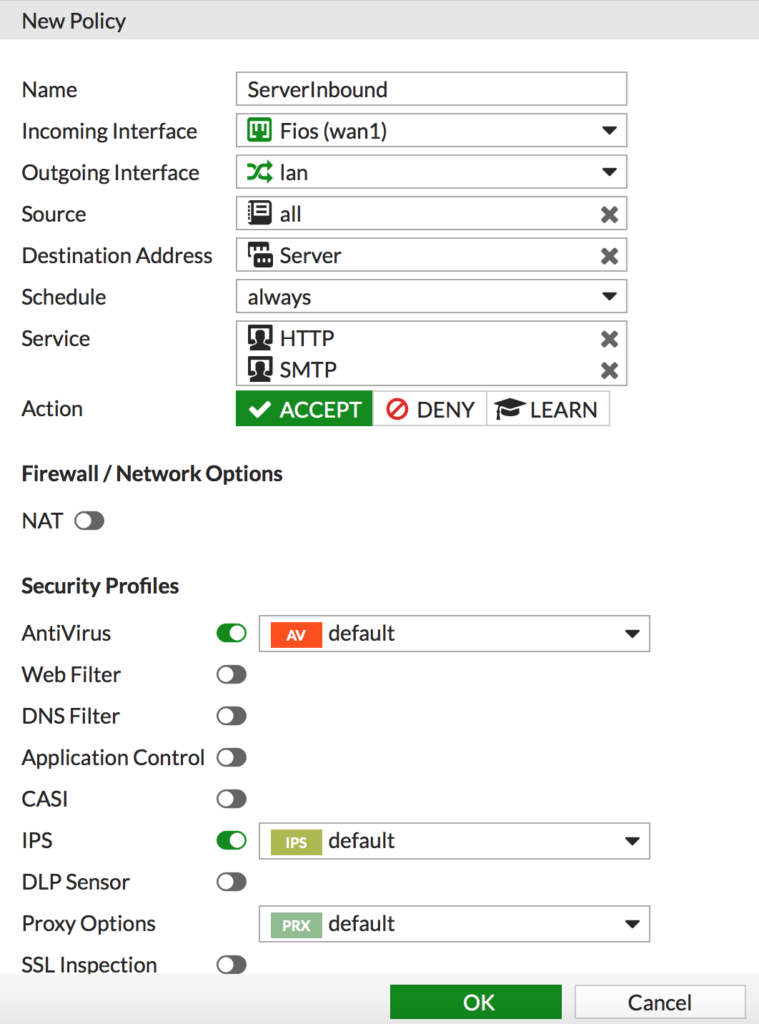
- Navigate to Policy & Objects > IPv4 Policy and click Create new
- Enter a descriptive name
- Set the interfaces
- Set the source. In this example it’s set to all but you can also create an object and limit this to only allow certain sources in. This is useful for mail filtering services for example.
- Set the Destination Address to the VIP group
- Add the services you want to allow in
- DISABLE NAT. The VIP is doing the NAT so we don’t want the policy to apply any NAT
- Set any security policies you want to apply to these connections. It’s outbound in, I suggest AntiVirus and IPS
- Click OK when done

That’s it! Traffic is now redirected for the ports in question from the Internet to the local protected server.