FortiGate Agent Based FSSO AD Integration v5.4
If you want to report on user Internet usage and possibly even define access rules based on your Active Directory groups this document is for you. We’ll install the FSSO Collector Agent in basic mode, identify the groups we are interested in and setup the FortiGate.
The FSSO Collector will monitor the Windows security logs on your domain controller for log on and log off events, these events contain the IP address of the computer that logged on or off along with the AD username. It relays this information back to the FortiGate so your usage reports show up with identified usernames instead of IP addresses. You can also use this information for firewall rules based on username without requiring your users to login.
Let’s get started!
Domain Controller Configuration
- Download the FSSO software from the Fortinet support site and run the installer on your domain controller as an administrator
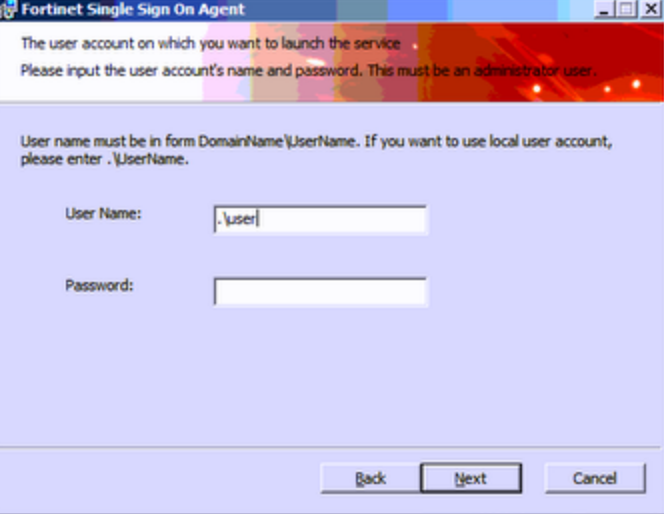
- Follow the default installation options. When you get to the credentials, setup a user that has WMI permissions and network administrator permissions
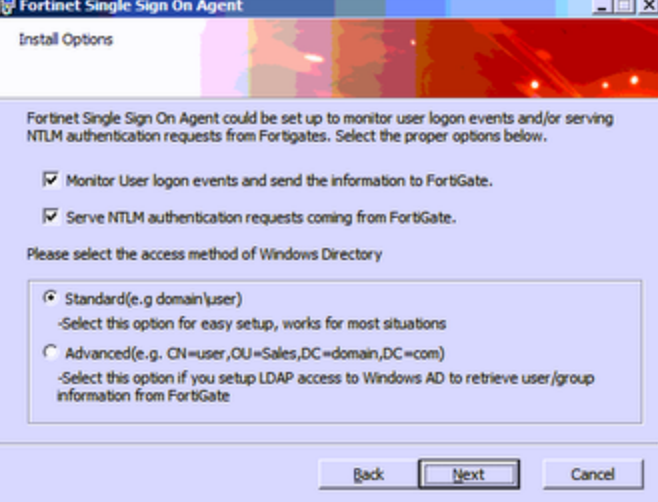
- Since we’re doing this in easy mode, leave the default options for settings.
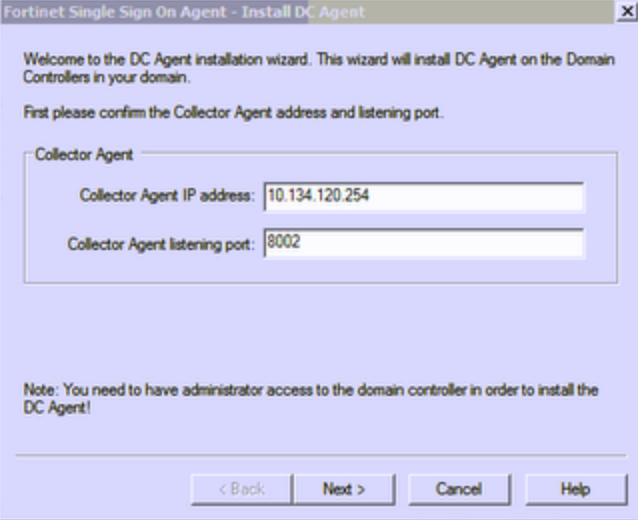
- After the installation finishes it launches the configuration. Confirm the IP information and port you want to use.
- Select the presented active directory domain name and click Next
- You will be presented with an option to select users you do not want to resolve. Select anything appropriate like service accounts that you don’t want to report on and click Next
- The configuration program locates all domain controllers, if they are active leave them selected, de-select any that are no longer active.
- Leave it set to Polling mode, check windows security event logs
Configure the agent
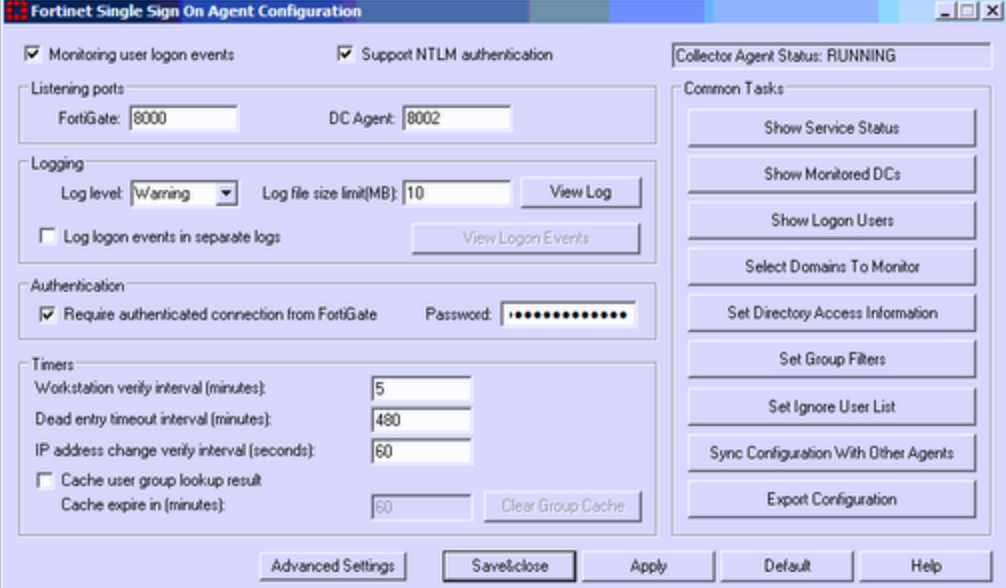
- Click on the Configure SSO Agent icon inside the Fortinet folder
- In the Authentication section change the password and make a note of this password, you will need it for the FortiGate configuration. Click Apply, and Save & Close.
Setup FortiGate
- Make sure you already have your FortiGate firewall up and running. You should also have LDAP already setup. If you don’t you can follow the LDAP section of this post:
FortiGate AD Authentication for SSL VPN v5.4 - Click on User & Devices > Single Sign On and click Create New
- Select Fortinet Single-Sign-On Agent and add your configuration:
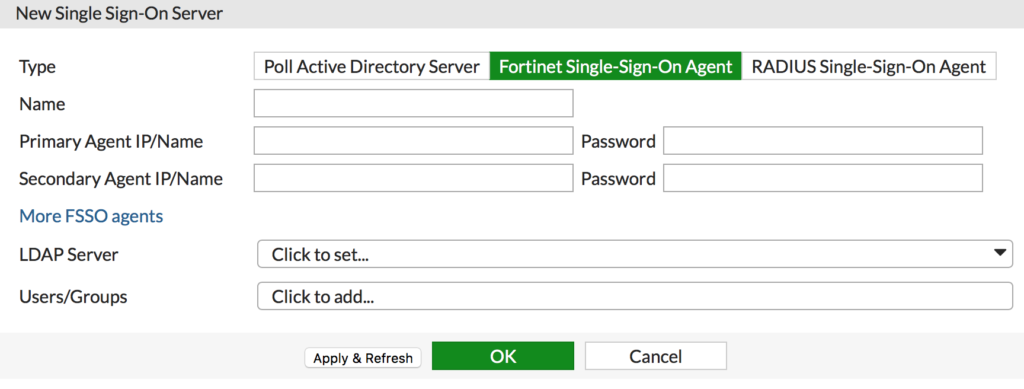
- Name: Enter your AD server name
- Primary Agent IP: Enter the IP address of your collector server
- Password: Enter the password you entered during the collector installation
- LDAP Server: Select your LDAP configuration
- You should be presented with a group selector. Add each user or group container you want to monitor and click OK
- After you click OK, check the status icon. If it’s green you are connected and ready. If it’s red there is a connectivity issue, most likely windows firewall on the server. You can try the following to resolve the connectivity issue:
- Verify you have the correct password on both sides.
- Allow the Forinet collector program through Windows firewall
- Make sure there is connectivity between the collector computer and the firewall
- Once you have a green check box in the status field you are done! It takes a logon/logoff event to start the data collecting so don’t be discouraged if you don’t immediately see usernames populating.