FortiGate AD Authentication for SSL VPN v5.4
Active Directory is a great authentication system, already in use on your network if you have a Windows Server based infrastructure so it makes sense to leverage for authenticating your SSL VPN users rather then creating separate, local login accounts.
Before you set this up on the FortiGate you first need to setup a service account on your windows server. Yes, you could use an already existing account but it’s advisable to use something separate so if/when you need to change the password of the account you understand where else it needs to be modified.
I’m not going to go into how to setup a Windows user account. Just setup an account with a descriptive name (like fgldap for example), a complex password, set the password to never expire and set user cannot change password.
Also, this example assumes your SSL VPN is already setup. If it’s not, follow this post for help: FortiGate SSL VPN v5.4
Add your authentication server
- On the ForiGate navigate to Users & Devices > LDAP Servers and click Create New
- Enter the details for your connection. Make a note of the example below, specifically the Common Name Identifier. I use sAMAccountName. This means VPN users will login with their same username they log into their computers with.If you don’t know the DN attributes you can use this article to help you find them. Figuring out an Active Directory Object’s DN Path

- Click Test to make sure what you entered is valid. Click OK to save it.
Now add a specific security group to your Windows server to identify users you want to be allowed to connect via VPN. Name it something descriptive, like SSL-VPN. Add in your users that you want to be able to connect.
Now add the new AD group to your existing FortiGate SSL VPN group (remember, if you haven’t already set the FortiGate side up, see the post referenced above for help getting it up and running!)
- Navigate to User & Devices > User Groups and edit your existing SSLVPN group
- Click Create New
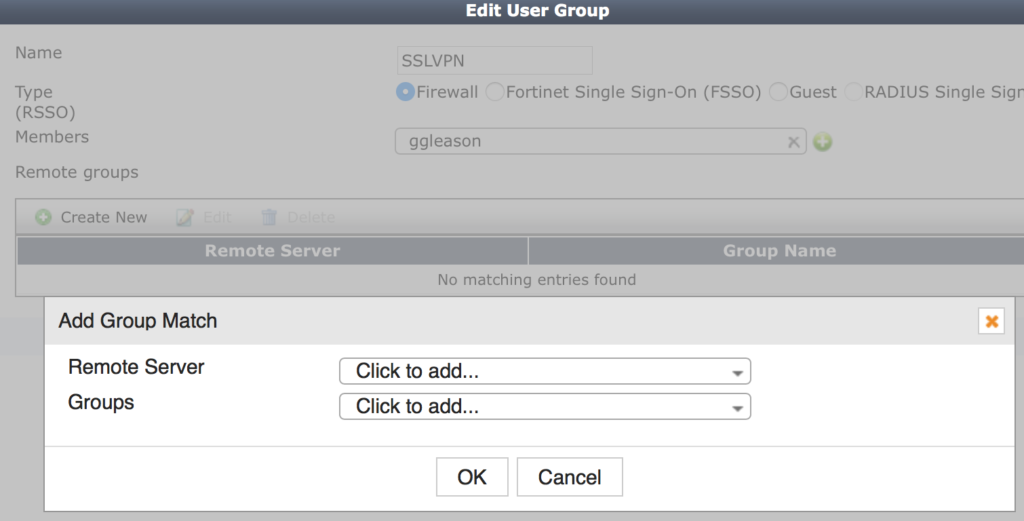
- Select your new LDP server from Remote, this will expand the group selector.
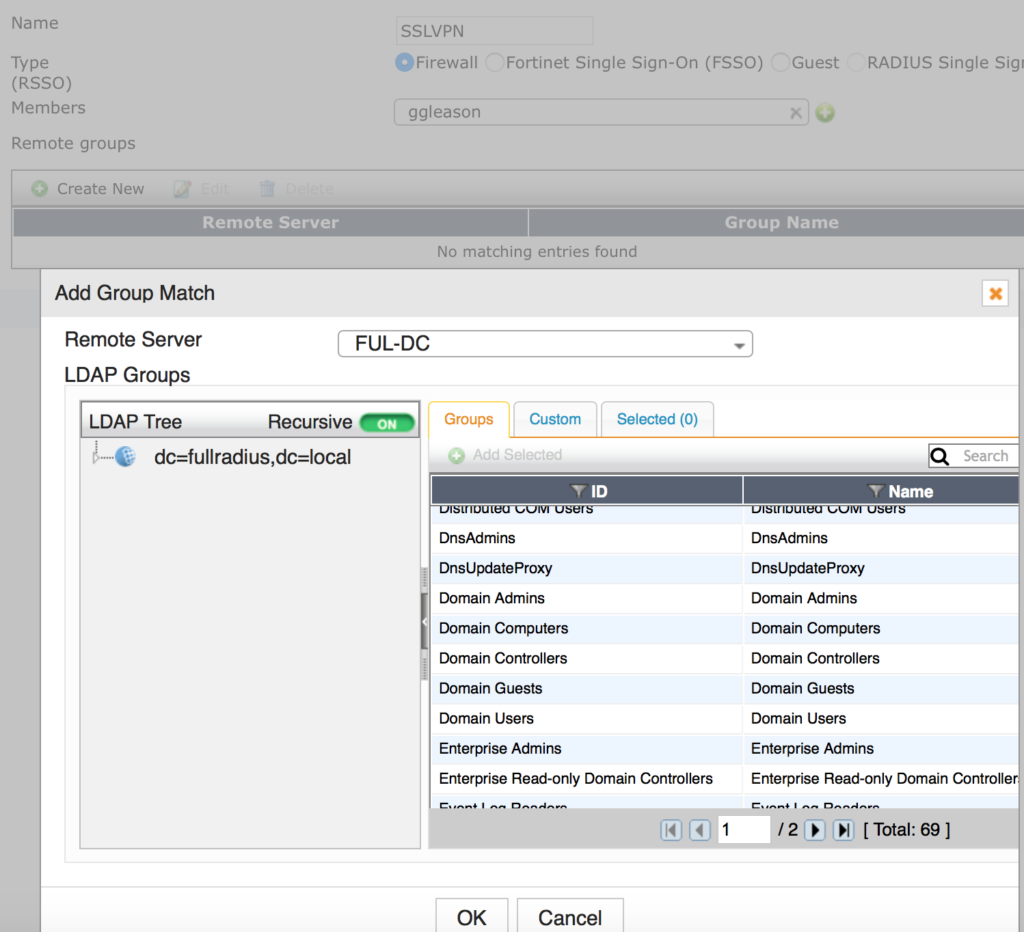
- Find the group you created earlier and click on it, select Add Selected from the pop-up and click OK
- Click OK to save your settings
That should be it assuming your SSL VPN was already setup following my other post!
Testing User Credentials
You set everything up as outlined but you can’t login. You can test your user login credentials pretty easily from the CLI.
- Navigate to the Dashboard and scroll down to the CLI Console widget.
- Enter the following replacing the arguments with what matches your environment.
diagnose test authserver ldap [name] [username] [password]

- You can see my test above failed. This is because there is no user called username with a password of password.