FortiGate Content Filtering Per User Override v5.4
Content filtering is a great feature with the FortiGate firewalls but the nature of what’s happening behind the scenes means some web sites do not like to be inspected and some users don’t fit the standard policy.
Issue: Blocking A Category but need to create an exception
So maybe your organization blocks the Social Networking category for all users but now HR can’t check out candidates and they need access. We’ll fix this with an exemption and a new policy as detailed below.
Enable multiple security profiles
- Navigate to System > Feature Select
- Enable Multiple Security Profiles and click OK

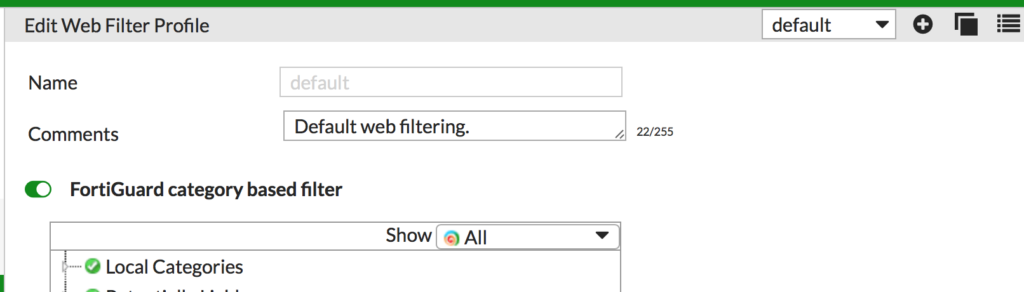
Create Second Web Filtering Profile
- Navigate to Security Profiles > Web Filter
- In the top right corner either click the + sign to create a new profile, or click the Copy icon next to it to clone the current profile. Give it a name and click OK
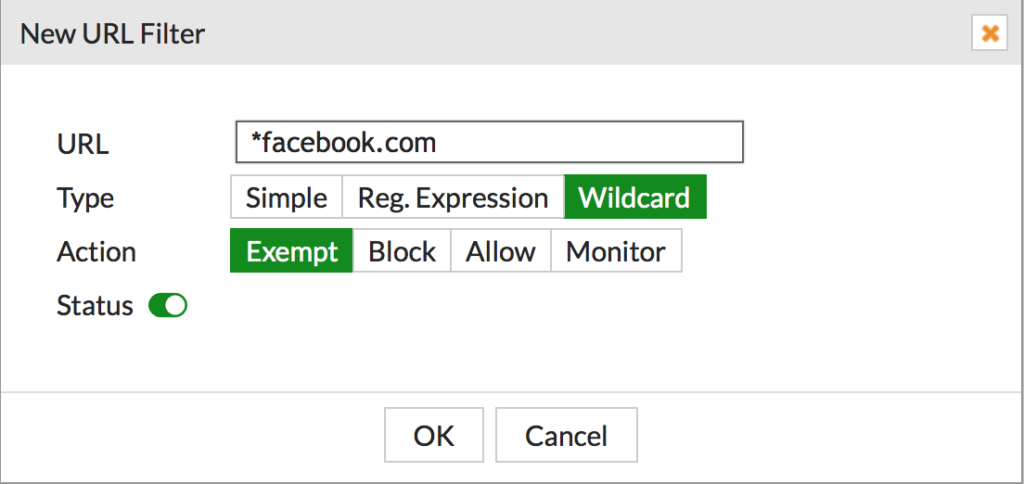
Modify the profile to allow the URL
- With the new Web Filter profile open, enable URL Filter (if it’s not already enabled) and click Create
- Enter the wildcard URL you want to allow and select Exempt. Don’t bother with Allow, you want Exempt so the site in question isn’t even inspected. Repeat this for all locations you want to override in this policy.
Create a security policy for the override
A few comments before we dive in. There are other, more elegant ways to handle this but they have dependencies. This way is the quick and dirty way but requires you to know the static IP address of the HR computers you want to allow. Other, more elegant methods would be:
- FSSO agent setup on your servers, allowing the firewall to detect AD users as they try to access the Internet and without prompting allowing users that should be allowed.
- Use LDAP user authentication to require users trying to get to Facebook.com (for this example) to have to enter their AD credentials. Authorized users would be good to proceed while others would be blocked.
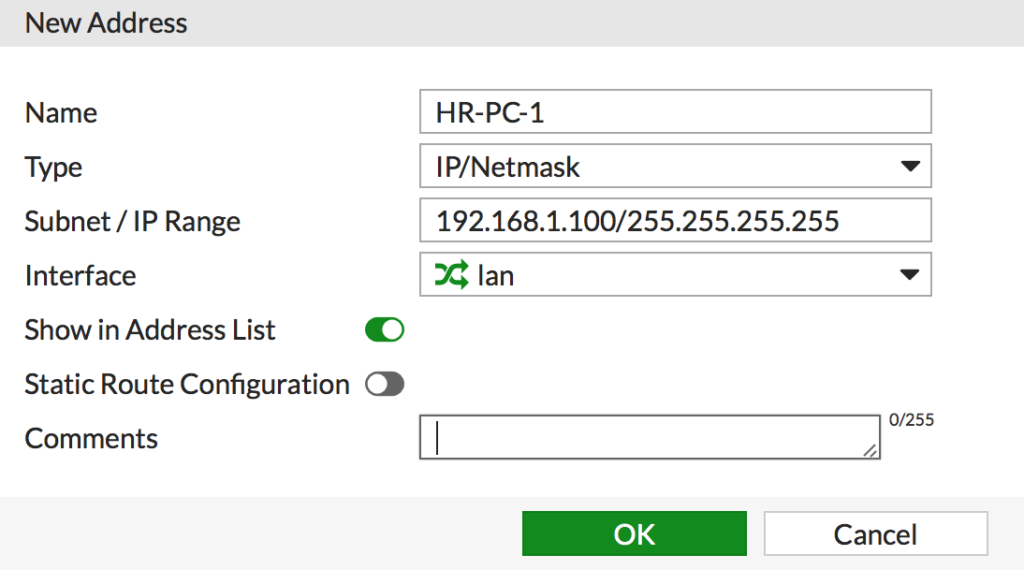
For this method, we’re going to create a separate address object for our HR users computer that has a static IP address. We’re then going to create a new outbound policy to reference the new over-ride policy.
- Navigate to Policy & Objects > Addresses. Click Create New > Address
- Enter the information for the persons computer and click OK
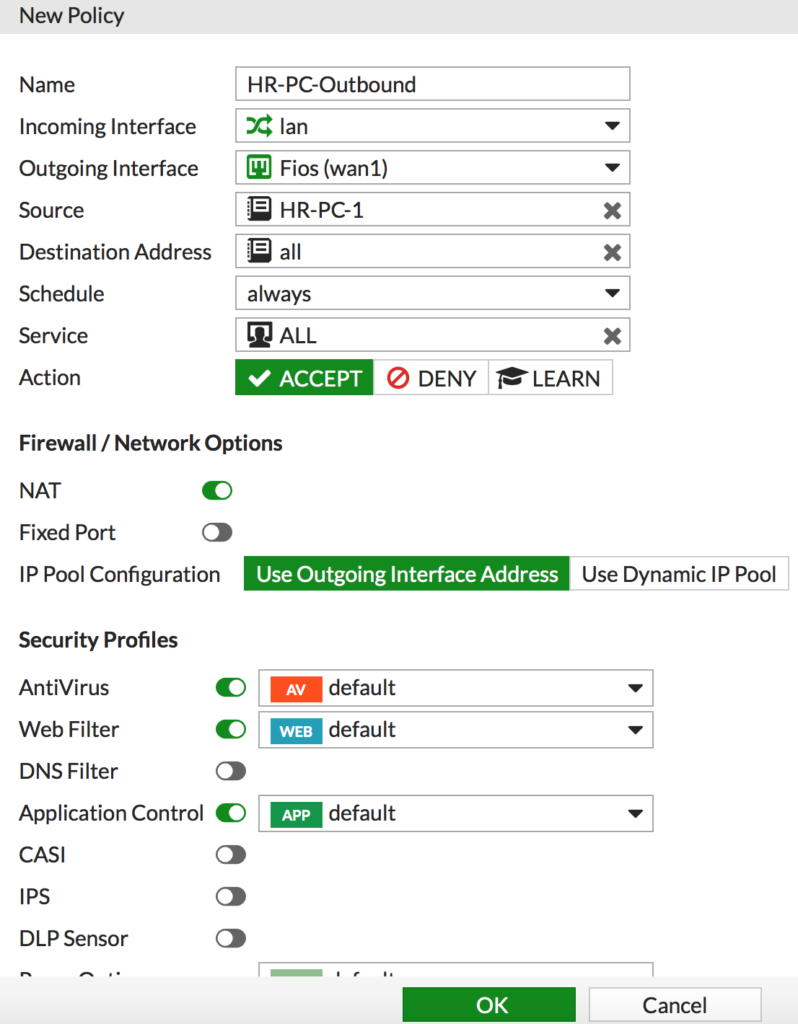
- Navigate to Policy & Objects > IPv4 and click Create New
- Fill out the new policy the same as your standard outbound policy with two exceptions.
- Set the Source to the HR Address Object we created above
- When you enable the Web Filtering policy click the drop down and select the over-ride policy
Finally, drag the new policy to the top of your policy list so it will take precedence over the standard outbound policy.